Pages

Sunday, August 31, 2014

It's always darkest before the dawn...and in the shade garden

Last weekend (maybe the weekend prior?) some guys came through our 'hood and trimmed our neighbor's trees, and then offered to trim ours.

We ended up paying them to trim our trees a bit, and pull up a bunch of the shrubs in the back as well. I was dreading yanking out that Holly myself:


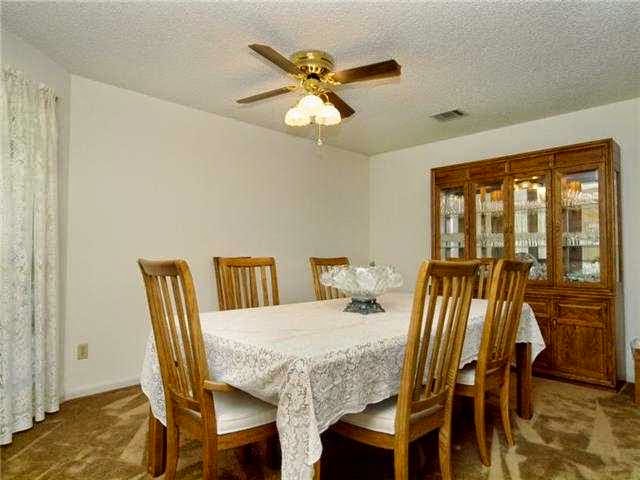
These pictures were taken by the seller's realtor, so trust me when I tell you that these pictures make it look waaaaay better than it actually was. It was a hot mess.

And now I have this, which is a hotter mess:


I left some of the reasonably decent looking trees, 99% of which are Crepe Myrtles. And of course the bazillion year old Oak with giant roots everywhere.

Don't get me wrong, I LOVE the Oak tree, I'm just not sure how to garden in its proximity. I will not, I repeat NOT, do that stupid thing people do where they plant a bunch of tiny plants in a circle around the base of the tree. It looks ridiculous. (It appears the former owners haphazardly - as they did all things - attempted that with some Mondo grass.)

I don't want grass at all. I want to do pea gravel and big flat pavers, with deep beds along the edges of the fence and house. This is my Pinterest page for the back.

Not sure how to put down pea gravel around all those big roots and not have it get washed toward the house in a good rain. And there are weird things going on over by the fence on the north fence side: I see tattered and half-buried landscape cloth to the left, and what appears to be wood edging from an aborted raised bed.

I might need to consult with someone on getting the back garden "foundation" set up properly before I dive into planting. Sigh. That part's not as much fun, but with Summer winding down it's the smarter move. I'd love to get enough settled that I could get a couple of trees in the ground, though. I'm thinking about three Texas sun tolerant Japanese Maples as my anchors. Apparently such things exist....

Sunday, August 24, 2014

This post is called 'Before and After', or 'Reason #437 I'm a terrible blogger'

Reason #2 is that I take terrible pictures. Reason #437 is that I never take 'Before' pictures, or if I do I forget to post them! But the good news is:

  1. I found the pictures from the original listing, so better late than never
  2. I decided to stick with the yellow color in the sunroom. For now, anyway.
Here's the sunroom, since that was on the top of the to-do list for the weekend.
Before: the blandest room in all of Blandville
What this photo can't possibly convey is how ugly the tile is, and how much the windows need to be replaced. (You know, the windows hidden behind the gawd awful curtains on brass curtain rods.) Mind you, the room hasn't looked quite like that since the day we got the keys: the first thing I did was to pull down all the window treatments.

The tile will be replaced someday, and I need to sew a cushion cover for the bench, but this is certainly an improvement:


It kind of makes me want to repaint the dining area, which is right next to it...but I'm going try to stifle that urge for as long as I possibly can.

So now on to the living area and the boys' playroom! (These will be more dramatic due to the addition of hardwood floors and removal of popcorn ceiling, but I'm taking credit for having done all that since I'll be paying it off for the next year....)
Before
After (this caption is probably superfluous)

Before
(Bonus shot of Ollie looking for his squeaky mouse.)
 

View from the informal (kitchen) dining area
If you look closely, you can see the unpainted edges next to the ceiling; I couldn't reach any higher with a paint brush on our tallest ladder. Someday I'll address that....

How about that carpet, huh? And note the strip of tile in between the formal dining area and the living area. It matched the kitchen/informal dining area, so it had that going for it.
Before
(Again: Ollie the photobomber)

Before: formal dining area
Now: a play area for the boys
I have to give the seller's realtor this: she took photos that look bright and clean, and the home looks ginormous! But despite my inept photography skills I think there's still an obvious improvement.

You might be wondering what's going on with the fireplace. As you can tell from the before and after comparison, I painted it white and that made a huge difference: it went from looking country to looking more modern and like an actual feature of the room. 
(Full disclosure: I haven't even painted it yet, I've only primed it.)
Those shapes in the middle are some rudimentary fretwork designs (just cut outs of paper). 

I agonized over what to do with that center space: it's heavily textured wall, and I didn't like the look of either a mirror or a picture. I'll need to get some very thin balsa wood cut to size, nail it up there, paint it, and then apply the trim in whatever pattern I settle on.

Here's what gave me the idea:
Image: Burnham Design (http://www.burnhamdesign.com)
Pretty amazing, huh? Here's something a little closer to what I envision:
(Sorry for the poor-quality photo)
Both rooms need the ceiling fans replaced someday, but we'll get there.

Monday, August 18, 2014

Garden updates

I've made a few edits to the front garden bed, but they were significant.

I dug up the Valentine roses and put them in pots in the back. I did this for 2 reasons:
  1. I decided I really wanted an orange bloom instead of red
  2. The deer were decimating them
I'll keep them there until it's cool enough to put them back in the ground, and then I'll plant them in the back. They're flourishing without deer snacking on them nightly, which doesn't bode well for the roses I plan to replace them with. This gardening-with-deer thing is more challenging than I anticipated.

I'm using 'Lafter' instead, which you might have seen in pictures from my old garden.
Image from Countryside Roses
I'm only planting 3, and if I can't keep them from getting stripped clean by the stinkin' deer then I'll have to find an alternative entirely to roses in the front. That prospect makes me sad.

I also bought some Canna 'Wyoming' from Karchesky Canna. I had some of those in my old garden as well. (I pulled up the 'Blueberry Sparkler' canna I planted in the Spring, and it's now in a temporary pot too.)

And now my favorite recent purchase: Yucca Rostrata 'Sapphire Skies':

I'd had the smaller one in a pot for a few years, and got the larger one for a really good price. (It's approximately 25 years old - they're slow growers.)


It's exactly what I'd originally pictured against that wall, but seemed too expensive at the time. You know how sometimes you think about making a big purchase for a long while, and then when you do it's not what you hoped? This wasn't one of those times. I'd spent all summer being dissatisfied with that bed's composition, and I finally feel like it's moving in the right direction.

You can't tell from the picture, but I have smaller yucca rostrata in the pots throughout the garden, so there's symmetry and all that.

I just received some iris I ordered from Schreiner's Iris, and I'm anxious to get those in the ground but I'm keeping them in pots until September. I can't afford to lose any of them to this heat!

I installed some drip irrigation today, so we'll see if that keeps things alive. It finally started getting stupid hot here. We were lucky to have had as mild a Spring as we did, for as long as we did.

In other news (Updated 8/24 with new 'before' pictures)

I realized I never posted about a few other happenings inside the house! After his rousing success with the bathroom fixtures, Ryan was successfully badgered into replacing the fixtures in the hall and foyer.
Old dated and mismatched lighting
New light in foyer
New light in hallway
They're simple and hopefully timeless. Regardless, they were inexpensive!

I finally bit the bullet and repainted the entire house. I think I'd written about hating the color (Sherwin Williams 'Modern Gray') but hoping I'd get over it. I didn't, so I agonized over gray paint swatches for weeks, and finally went with Benjamin Moore 'Classic Gray'.

BM Classic Gray on top, SW Modern Gray on bottom. 

I like it, but strangely it doesn't really look gray at all? It almost looks white, at least until you compare it to something really white (like the ceiling). I'm happy with it, though!

I never posted pictures of the dining area wall, either! It was one of my first projects and it's what gave me the false confidence about wallpaper removal.

I took it down in less than 2 hours:


I originally painted it the same red I had on the dining room wall of my old house. It's a beautiful red, but it kind of dominated the entire living area...
Easter 2014
So I painted it 'Mega Greige' by Sherwin Williams. It's a really nice darker gray. I may get tired of it someday, but for now it's very relaxing and I like it.

I've been remarkably less successful in the sunroom. I painted it Benjamin Moore's 'Palladian Blue' before we even moved in, and immediately hated it because it looked like a baby blue.
Then I painted over it with Benjamin Moore's 'Lehigh Green', which was better but but looked a little seafoam-eqsue at certain times of day.

My latest failure is Benjamin Moore 'Sweet Pear'. I thought it would surely be a winner, since I'd painted the living room in my old house that color and loved it. It was a pale, cool yellow-green.

Again, no. It looks like Big Bird's lair.

Soooo...I got another gallon of Mega Greige, and we'll see if I can live with it for longer than 10 minutes.


Sunday, August 17, 2014

Bathroom update

It was brought to my attention that I've neglected this blog, and specifically never posted about the bathroom makeover results! That was partly due to a hectic work schedule and then vacation, but largely because I still hate it.

I'm not even sure I hate it less, because now it has stolen an entire weekend from my life that I'll never get back. But it's arguably less hideous. And our relationship survived the project, so: bonus!

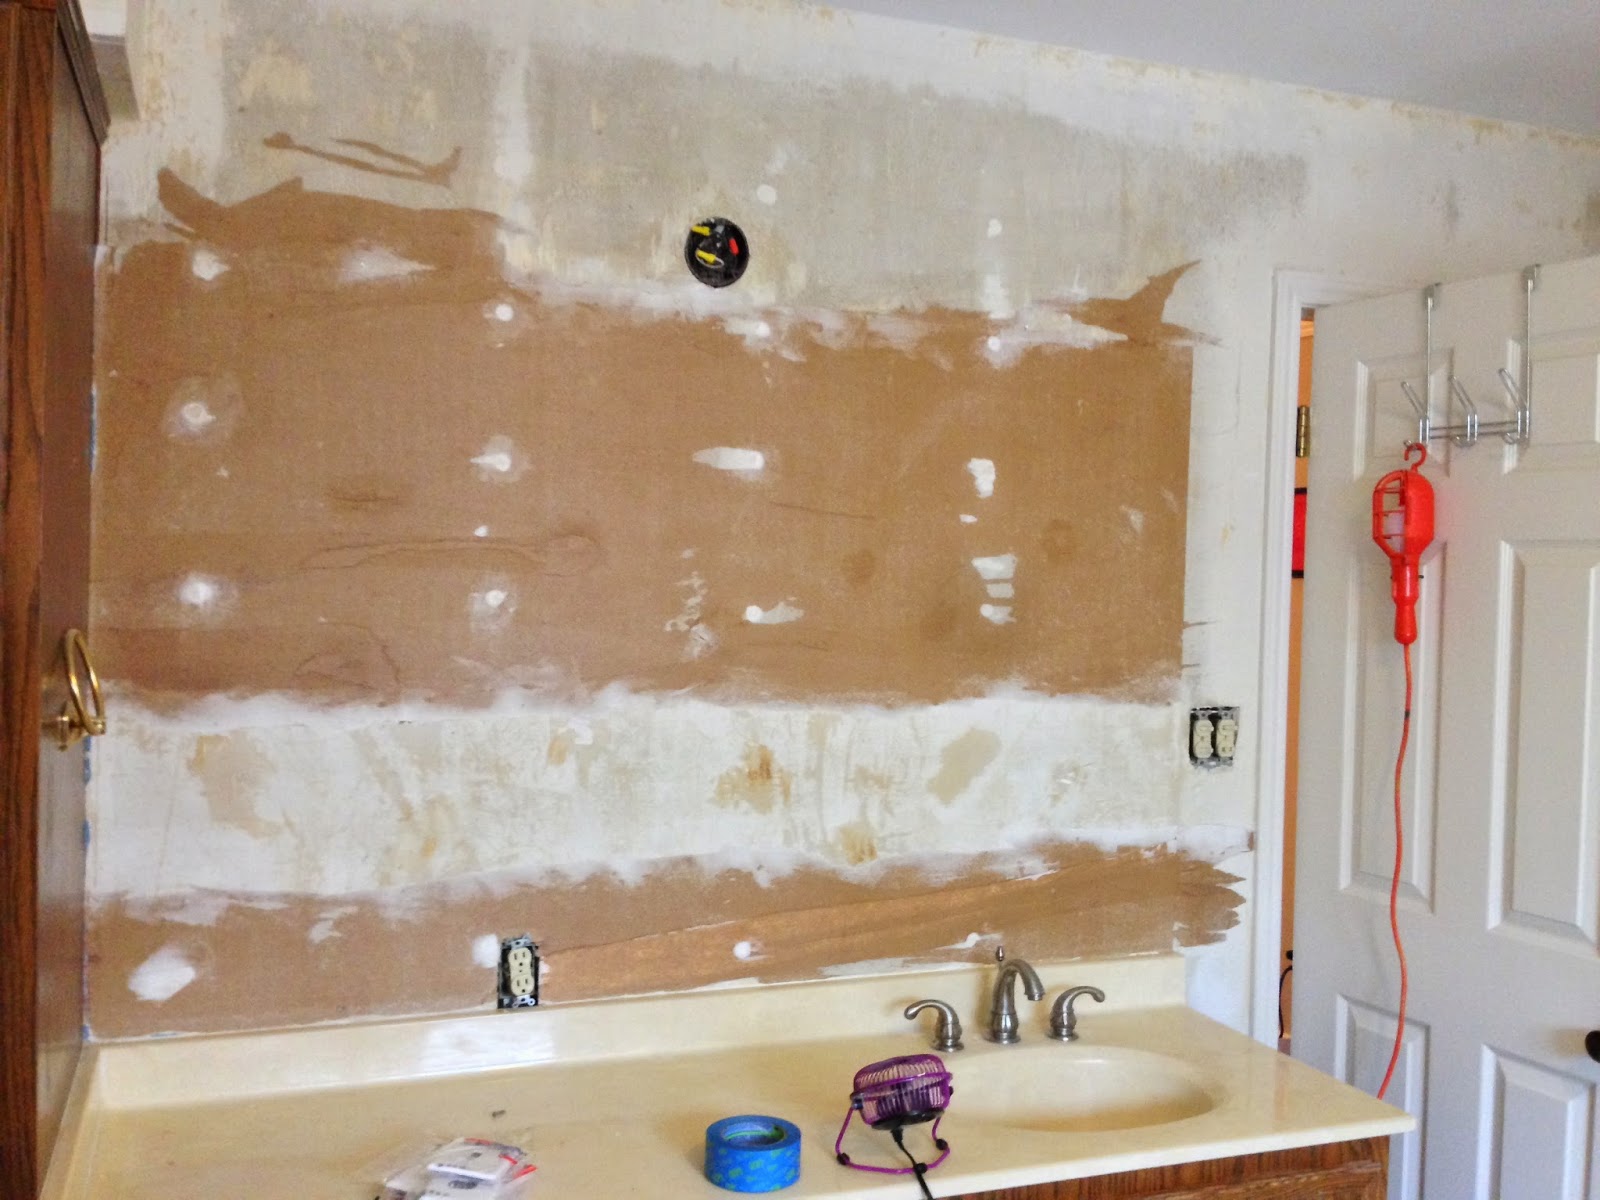
Here are some pictures after all the wallpaper was removed:


Why yes, that is drywall paper you see over the sink areas. I learned that when they put the wallpaper up, they pasted it right onto the drywall - no primer or nuthin'. Apparently when one does that, it fuses with the drywall and then there's no getting it off without taking chunks of drywall along with it. (So full of loathing for them....)

After the walls dried, I primed them with a product that's supposed to be good for painting over paper surfaces, then did a coat of regular ol' Kilz primer, and then painted. This is the final(ish) result:

Ryan did a rockstar job of putting up new lighting - it's the Martha Stewart line, and there's a 2-light fixture over his sink. He'd never replaced light fixtures before, so yay him!!

Later we put a medicine cabinet over my sink. Still need to put a mirror over his but since he's not whining about it I'm taking my time.


The color is Behr 'Flagstaff Green', which is a greenish-blue.

I still haven't painted the cabinets and I'm ignoring the toilet area entirely, but its tolerable and Ryan said he was 100% happier after we "finished", so that's good enough for me! Perhaps someday if I'm profoundly bored I'll do more, but nobody hold their breath for that.

What you don't see, and don't need to see to appreciate, is that we had to replace the toilet about a month ago. It wasn't a planned expense, but THAT has made me happier than anything else we've done to that bath: gone is the squatty troll toilet, replaced with a standard white toilet for humans of normal height. And it flushes with authority, unlike the old one where you'd stand with the plunger in hand, in case it upchucked because you used an extra square of paper. It's the little things....